If your ZPL label looks fine in preview but prints with cut-off text, missing barcodes, or content shifted off the edge, the root cause is often simple: the printer and the label aren’t agreeing on dimensions.
“Size issues” usually show up as clipping, unexpected scaling, or elements that drift after small edits. The good news is that these problems are repeatable, which means they’re fixable. This guide explains why ZPL labels get cut off, how print width and label length really work, and a practical set of checks to stabilize output across printers and workflows.


The real reason labels get cut off
A ZPL label is a coordinate system. You place elements at positions, and the printer renders them onto a physical label with a specific print width and label length.
When those assumptions don’t match reality, you’ll see failures like:
Right-side clipping (print width too small)
Bottom clipping (label length too short)
Elements “disappear” because they’re outside the printable area
Text or barcodes drift because the label was authored for a different stock size
Most teams treat these as random. They’re not. They’re almost always one of a handful of mismatches.
What ZPL print width and label length control (^PW and ^LL)
Two commands come up constantly in label size problems:
^PW controls print width (how wide the printer treats the label area)
^LL controls label length (how tall the label area is)
You don’t need to memorize every variant to diagnose the issue. You just need to understand this:
If ^PW is smaller than your actual layout width, the right side will get cut off.
If ^LL is smaller than your layout height, the bottom will get cut off.
If your layout is authored for one stock size and printed on another, everything becomes fragile.
Symptom-based diagnosis (find the cause fast)
Use the symptom to jump to the likely cause.
Right edge is cut off (text disappears on the right)
Likely causes:
^PW is too small for your design
Your design assumes a wider label stock than you’re printing on
Margins are too tight and your printer’s printable area is narrower than expected
Fix approach:
Confirm the intended label width in dots (based on stock width and DPI)
Set or adjust ^PW to match that intended width
Keep a safe margin so content isn’t placed at the extreme edge
Bottom edge is cut off (barcodes or footers missing)
Likely causes:
^LL is too short
Your design places elements too close to the bottom edge
Your data overflow pushes elements downward
Fix approach:
Confirm intended label height in dots
Set or adjust ^LL so your design fits with safe space
Stress-test with worst-case data to ensure the layout doesn’t expand unexpectedly
Everything looks “scaled” or proportionally wrong
Likely causes:
You are printing on a different DPI than the label was designed for
You’re switching between printers with different DPI assumptions
The label was converted from a different system and dimensions were never normalized
Fix approach:
Confirm the target printer DPI and design for that DPI
Avoid mixing “same label” across different DPIs without explicit rules
If you must support multiple DPIs, maintain separate templates or a conversion layer
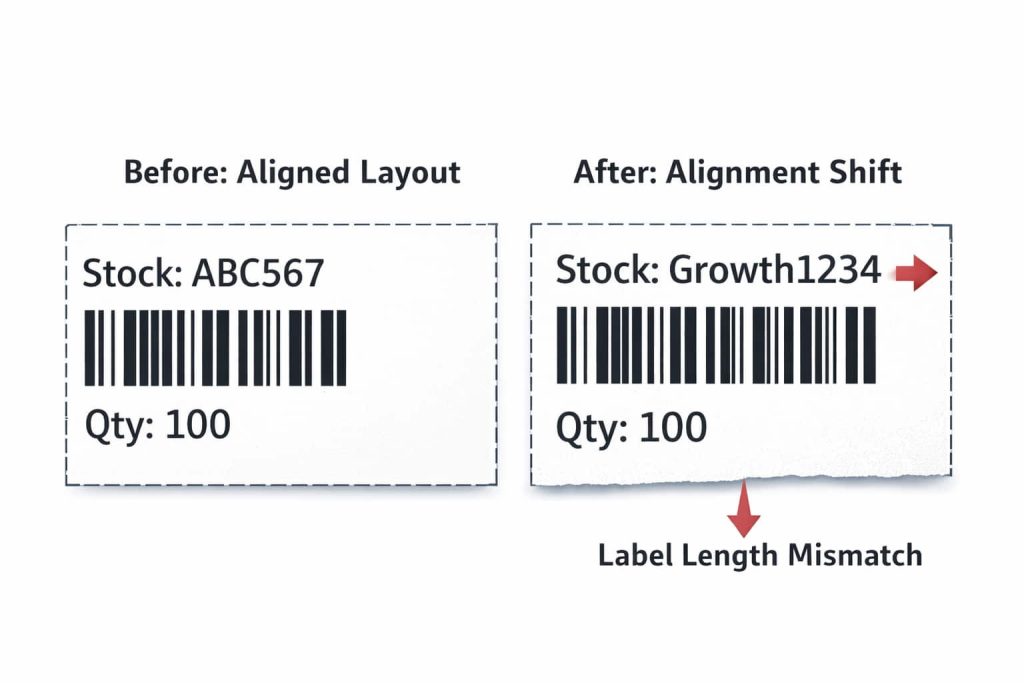
Alignment shifts after small edits
Likely causes:
You’re placing elements near the boundary and small changes cross the printable area
Your template lacks a consistent grid and safe zones
Variable fields expand unpredictably and push content
Fix approach:
Introduce consistent margins and grid spacing
Reserve flexible space for variable fields
Validate with a worst-case dataset on every change
A practical fix workflow (works for most teams)
If you want to stop chasing one-off issues, do the same set of checks every time.
Step 1: Confirm the physical assumptions
Write down:
Label stock width and height
Target printer DPI
Required margins (safe zone)
This is the baseline. Without it, every label is a guess.
Convert dimensions to dots (so ZPL matches reality)
ZPL works in dots. Your stock is measured in inches or millimeters. Convert once and keep it consistent.
Rules of thumb:
At 203 dpi: 1 inch = 203 dots
At 300 dpi: 1 inch = 300 dots
At 600 dpi: 1 inch = 600 dots
If you’re working in mm, convert mm to inches first (mm ÷ 25.4), then multiply by DPI.
Set print width and label length intentionally
Make sure your ZPL explicitly matches your assumptions:
Print width matches stock width in dots
Label length matches stock height in dots
Then design content to stay inside margins, not right up to the boundary.
Validate boundary elements first
Boundary elements are the first to fail:
Rightmost text
Bottom barcodes
Logos near the edges
Any boxes/lines that touch the border
If those are stable, the center of the label is usually fine.
For fast iteration, render the label during debugging with ZPL Viewer so you can spot cut-offs before you print and waste stock.
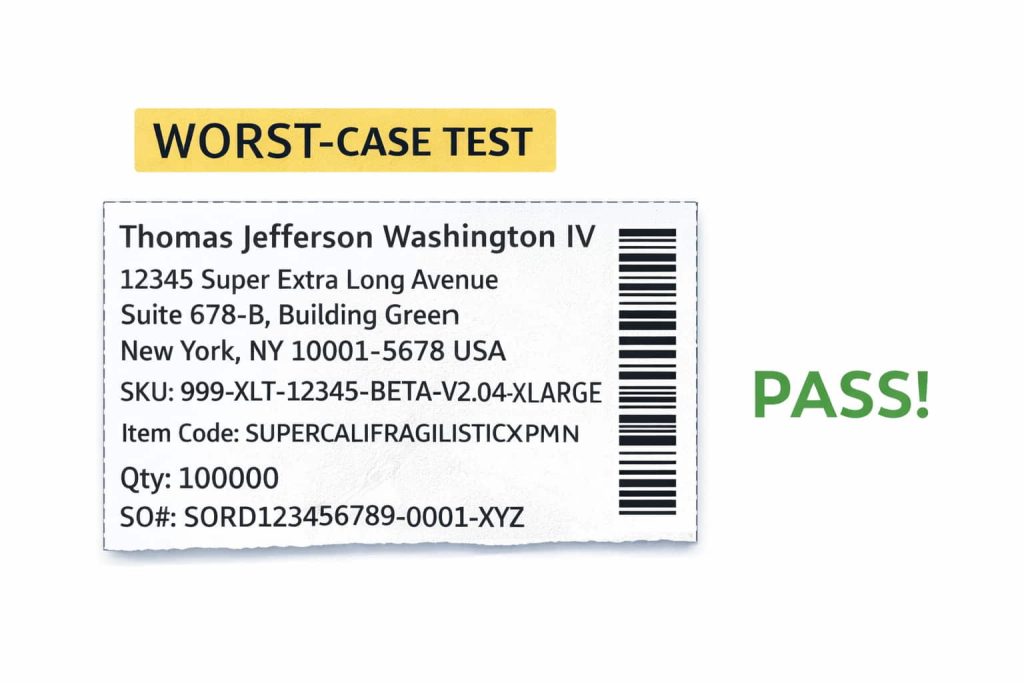
Stress-test with worst-case data
Even a perfectly sized label will fail if variable data grows unexpectedly.
Test:
Longest realistic product names, addresses, SKUs
Multiple line breaks where applicable
Empty or missing values
Special characters that might change spacing
If your layout survives worst-case data, it’s much less likely to break in production.
Standardize templates across printers and teams
If you run multiple printers, multiple sites, or multiple teams, size issues often come from inconsistent assumptions.
Standardize:
One “source of truth” per label type and stock size
Naming that encodes size and DPI (so it’s obvious what it’s for)
A repeatable validation checklist before production
And if your team needs a quick shared baseline during review, an online ZPL viewer helps keep previews consistent across machines without needing everyone to install the same tooling.
Common mistakes that keep size problems alive
Avoid these, and you’ll eliminate most repeat failures.
Designing “to the edge” with no margin
Validating with only average data, never worst-case
Assuming all printers behave the same even at the same DPI
Copying a label from another stock size and “just nudging” elements
Skipping validation because “it printed fine last week”
Final checklist: fix cut-offs in under 2 minutes
If you’re mid-incident, use this rapid check:
Confirm label width/height and DPI for the printer you’re using
Confirm your ZPL is using the correct print width and label length assumptions
Check right/bottom boundary elements in preview
Test once with worst-case data before printing a batch
When label dimensions are stable, everything else becomes easier: barcodes scan more reliably, alignment stays consistent, and template changes stop causing surprises.